Sadly life and work taken away from our gardening time this summer. The result has been very few posts over the last few months. The thing I love about bulbs is that they mostly take care of themselves. So while I have been working they have been blooming!
It has been a couple months since the first of the bulbs we got at the home and garden show bloomed. The first was the Fangio Red Lily. It bloomed and faded before anything got close.
Well it is late summer now and we have had a heated race for second and third place.
The second one to bloom was the Casa Blanca. This was a stunning beauty. Huge blooms and it smelled delightful. At the garden show they called it the mother of all lilies and I was right there with them until......
The third place winner emerged. The is the "Aubade - White/Yellow"
This is a stunner. I love this lily! The blooms are almost the size of the Casa Blanca but I find them much prettier. There were also more of them. I realize growing in containers limits you somewhat but I was thrilled with this Lily. Next year I am getting much more of these!
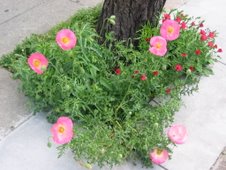
So our Bulb Watch has been all about lilies. Until this guy showed up on the street.
I had thought this was the Acidanthera but it looks different than I imagined. The only other bulb it could be was the Crocosmia but it does not look like that either. Whatever the case this is a pretty cool flower. The foliage had been around all summer and I did not think it was going to do anything and then one day I notice the flower. I have anoter one of these out back but not much is happening.
Sadly our Dahlias did not really materialize. One out front got cut down before it could flower and the one in the pot is not doing well. These guys need a little more love than I have to give them I think.
I still have a Begonia that has just started to break the surface. Which I hope to share with you at a future day.
So that is what is blooming around here. Looking back, the first bulbs to sprout, bloomed in the order they first broke the ground. I had a lot of fun with these bulbs. I can't wait until the garden show next year. I will be sure to visit Vanbeen Blubs again. By they way they have been watching the results. Someone is reading the blog, besides my mom and our good friend Andrew! If only we could update it more.
Saturday, August 23, 2008
Friday, July 4, 2008
For My Grandma's
 Every Fourth of July I used to go up with my family to visit my grandma in Henry, Il to go to the carnival and watch the fireworks over the Illinois river. My grandma loved Lincoln and I always think of her on the fourth. She made the most wonderful pies. Going to her house was always an adventure for me. Today I realized just how much I miss her.
Just when I was feeling a little down I noticed that the orange lily I planted last year bloomed again today. No grumples this year. My other grandma had beautiful orange lilies that surrounded her house. I think that is one of the places I first learned the joys of gardening. It seems as America turns another year older I can still feel the love of generations past.

Sunday, June 22, 2008
We Have a WInner
 It looks like we have a Bulb Watch Winner!
This is the Fangio Red Lilly. It was the first of the Bulbs to sprout and had dominated all of the others. It should be blooming for the next couple weeks before the number 2 and 3 Lilies start to bloom.
More photos of this beauty can be found here
Saturday, May 24, 2008
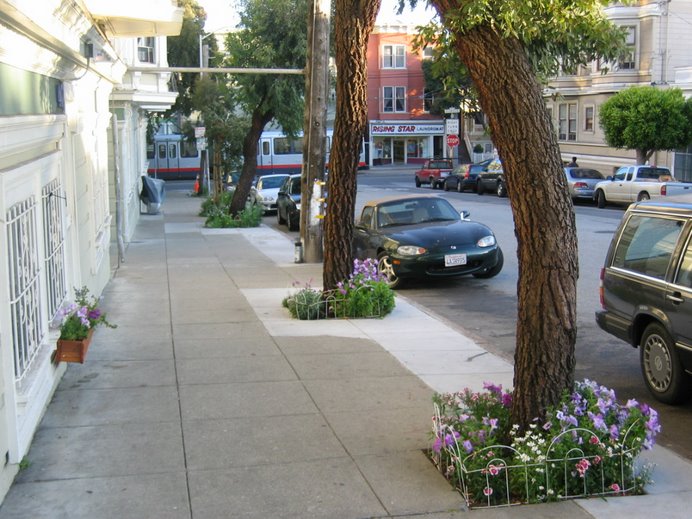
Building A Flower Bed
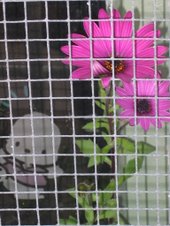
When we started planting around the trees on our block we did not think too much about protecting them. We started by scattering some seeds one night and several months later we had a make shift street garden. Perhaps the biggest challenge of street gardening is letting go. Once something is on the street anything can happen. We found this out soon as the flowers we planted were picked, or trampled on. A lot of people get off of Muni buy our block so we get much more foot traffic than our neighbors. Over time I thought we need to put up a fence around the trees. This would keep the dogs at a distance and offer a little protection. We started with a simple wire fence from the hardware store. These were cheap but did not hold up very well when a drunk person stumbles on to them on a friday night. Next I thought to add a wooden frame to hang the wire fence on. The guy up the street had done this and it looked pretty sturdy. Well it worked well for a little while but what we found is that people like to smash stuff. A wooden frame wire fence just doesn't hold up when someone is feeling destructive. Readers of this blog will know that I used to take it pretty bad when someone smashed them up. After fixing them too many times I finally decided that I needed to make a commitment and build a real flower bet around the trees. One that could take most abuse the neighborhood could throw at it.
I do not know what the psychological barrier was in my head. Somehow I thought putting a perminiate bed around the trees would be too expensive, or my carpentry skills were not up to snuff. Whatever it was I broke thru it. I decided that I was going to start building some serious flower beds. So far I built 3. I plan to build several more however some trees present some challenges because of their roots. I thought I would share my experience of building these flower beds in the hopes that others might find it useful.
The first thing you want to do is to clean up the tree. Even though we have been street gardening for 3 years now a lot of garbage still ends up around the trees. So lets assume you are starting from scratch.
Step One: Tree Cleaning
The first thing you must have is a good pair of gloves! Trees in the city have taken a lot of abuse and you never know what you may find. I often find broken glass, or used syringes. You do not want to come across this stuff with bare hands. (You Grow Girl has a wonderful post of the things you may find in your street garden) I will usually bring an empty soda bottle with me for this task in case I do find a syringe. Sealing it in the bottle will protect someone else from getting stuck with it. (There is a needle exchange behind the Safeway on market on Tuesday evenings. I go there to dispose of any needles I find). You will want to clean out all of the garbage and use a gardening tool to break up the soil and take out any weeds. Frequently we will find buried bits of glass or metal. We usually will add some new topsoil to make a soil mixture a little more friendly to growing. This step is by far the hardest part. It can be very unpleasant work. But if you are willing to undertake it the rewards can be great.
Step 2: Remove soil from the edges
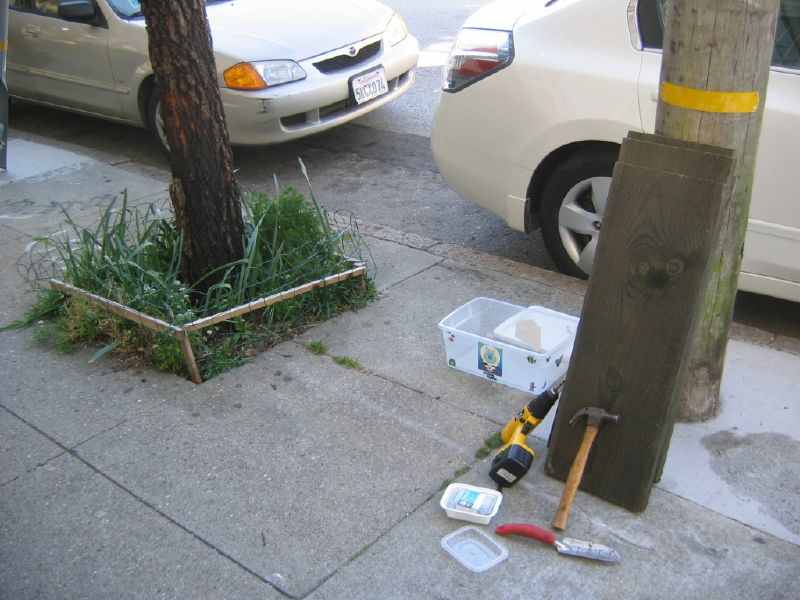
You are going to want to take out about 2 inches of soil all around the edges. You will be building a trench where your flower bed will go beeneth the ground. This step is very important because you will know exactly what you have to work with. What I have frequently found is that when the city cut a hole in the sidewalk for the tree, it is smooth but about 1" under the surface there are rocks are pieces of the sidewalk that will prevent the bed from going down deep enough to anchor properly. If this is the case you will want to have a hammer and a chisel to gently break off any pieces around the edge. You need to be very careful not to crack the side walk. I found most of the rocks in the concrete busted out easly it just took a little work. Leave your self some time as this process can go longer than you might expect.
Step 3: Measure the opening.
My dad always said measure twice cut once. Words to live by! After measuring twice I took off 1/4" off of each measurement. The sidewalk cuts are not always even and wood could be warped a little, having some breathing room is not a bad thing. You will not even notice a 1/4". The next thing you will want to think about is the size of wood you will be using for the bed. I have used 2" x 12". This makes for a pretty big bed about 9-10" above sidewalk level. For this I decided that I needed to take 3" to 3 1/4" off of one side to account for the overlap. (a 2 x 12 is more like a 1 1/2 x 12). What I typically found was that a hole was 35" on one side and 36" on the other. My final measurements (after taking my 1/4" all around and 3" on one side) would come out to be 34+3/4" x 32+3/4. If you use different size board you will want to adjust your math.
Step 4: Got wood?
I went to the Discount Builder Supply on Mission in SF to purchase the lumber. I was able to get a 2x12x12 for about $24 bucks. They charge a quarter per cut so the wood came out to $25. While you are there you will want to buy some "deck screws" as well. They will also reccomend that you treat the wood where it was cut. They sold me some spray to do it with that I have used on all the other fiences I have built and it cost about $10.
Step 5: Install!
It took a little time to make sure that all the boards lined up and that I had cleaned up enough soil to sink them deep. Once they were lined up, I got out my drill and drilled holes for the deck screws. I found my self drilling two holes then screwing in the deck screws, then moving to the other side and repeating. I started with 2 screws on each side but you will probably want to do four to be sure it is extra sturdy.
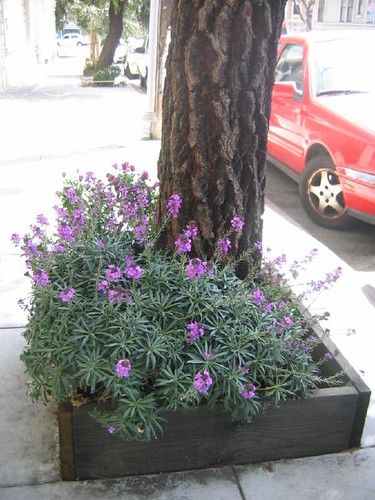
Step 6: You will want to then fill in all the edges with soil so you car garden straight up to the edge. While this process has take a couple Saturday afternoons it has been so worth it. I am not sure what took me this long. I could not be happier with the results. You can kick these thing and they will not budge. I really feel like they could be there for the next 10 years. We have been able to have some nice plants grow out front and they have been pretty well protected!
I would encourage people to build beds like this if they can. It gives your flowers a lot more protection. Of course it is still the street and anything can happen but at least now your flowers have a fighting chance. I have always wanted to try do put out some containers on on the street but I fear they will be stolen. Having a sturdy bed now means I have something I chain a conter pot to! I hope add some out door containers before the end of summer!
The Before and After
I do not know what the psychological barrier was in my head. Somehow I thought putting a perminiate bed around the trees would be too expensive, or my carpentry skills were not up to snuff. Whatever it was I broke thru it. I decided that I was going to start building some serious flower beds. So far I built 3. I plan to build several more however some trees present some challenges because of their roots. I thought I would share my experience of building these flower beds in the hopes that others might find it useful.
The first thing you want to do is to clean up the tree. Even though we have been street gardening for 3 years now a lot of garbage still ends up around the trees. So lets assume you are starting from scratch.
Step One: Tree Cleaning
The first thing you must have is a good pair of gloves! Trees in the city have taken a lot of abuse and you never know what you may find. I often find broken glass, or used syringes. You do not want to come across this stuff with bare hands. (You Grow Girl has a wonderful post of the things you may find in your street garden) I will usually bring an empty soda bottle with me for this task in case I do find a syringe. Sealing it in the bottle will protect someone else from getting stuck with it. (There is a needle exchange behind the Safeway on market on Tuesday evenings. I go there to dispose of any needles I find). You will want to clean out all of the garbage and use a gardening tool to break up the soil and take out any weeds. Frequently we will find buried bits of glass or metal. We usually will add some new topsoil to make a soil mixture a little more friendly to growing. This step is by far the hardest part. It can be very unpleasant work. But if you are willing to undertake it the rewards can be great.
Step 2: Remove soil from the edges
You are going to want to take out about 2 inches of soil all around the edges. You will be building a trench where your flower bed will go beeneth the ground. This step is very important because you will know exactly what you have to work with. What I have frequently found is that when the city cut a hole in the sidewalk for the tree, it is smooth but about 1" under the surface there are rocks are pieces of the sidewalk that will prevent the bed from going down deep enough to anchor properly. If this is the case you will want to have a hammer and a chisel to gently break off any pieces around the edge. You need to be very careful not to crack the side walk. I found most of the rocks in the concrete busted out easly it just took a little work. Leave your self some time as this process can go longer than you might expect.
Step 3: Measure the opening.
My dad always said measure twice cut once. Words to live by! After measuring twice I took off 1/4" off of each measurement. The sidewalk cuts are not always even and wood could be warped a little, having some breathing room is not a bad thing. You will not even notice a 1/4". The next thing you will want to think about is the size of wood you will be using for the bed. I have used 2" x 12". This makes for a pretty big bed about 9-10" above sidewalk level. For this I decided that I needed to take 3" to 3 1/4" off of one side to account for the overlap. (a 2 x 12 is more like a 1 1/2 x 12). What I typically found was that a hole was 35" on one side and 36" on the other. My final measurements (after taking my 1/4" all around and 3" on one side) would come out to be 34+3/4" x 32+3/4. If you use different size board you will want to adjust your math.
Step 4: Got wood?
I went to the Discount Builder Supply on Mission in SF to purchase the lumber. I was able to get a 2x12x12 for about $24 bucks. They charge a quarter per cut so the wood came out to $25. While you are there you will want to buy some "deck screws" as well. They will also reccomend that you treat the wood where it was cut. They sold me some spray to do it with that I have used on all the other fiences I have built and it cost about $10.
Step 5: Install!
It took a little time to make sure that all the boards lined up and that I had cleaned up enough soil to sink them deep. Once they were lined up, I got out my drill and drilled holes for the deck screws. I found my self drilling two holes then screwing in the deck screws, then moving to the other side and repeating. I started with 2 screws on each side but you will probably want to do four to be sure it is extra sturdy.
Step 6: You will want to then fill in all the edges with soil so you car garden straight up to the edge. While this process has take a couple Saturday afternoons it has been so worth it. I am not sure what took me this long. I could not be happier with the results. You can kick these thing and they will not budge. I really feel like they could be there for the next 10 years. We have been able to have some nice plants grow out front and they have been pretty well protected!
I would encourage people to build beds like this if they can. It gives your flowers a lot more protection. Of course it is still the street and anything can happen but at least now your flowers have a fighting chance. I have always wanted to try do put out some containers on on the street but I fear they will be stolen. Having a sturdy bed now means I have something I chain a conter pot to! I hope add some out door containers before the end of summer!
The Before and After
Worst Blogger Ever
I have to apologize for being so tardy with the blog updates. Sometimes life just gets in the way of blogging. Well I am happy to say that even though I stopped posting the flowers have kept growing and growing!
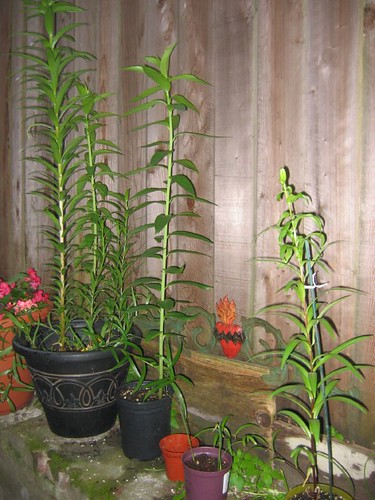
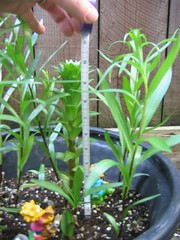
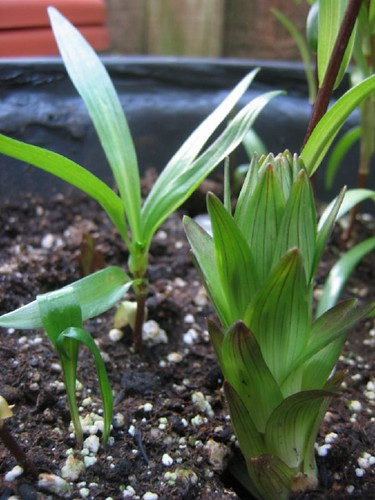
New BlubWatch updates are now on our Flickr page. You can see from the photo above that the lilies are out in front. We have had some late entries as well. Both of the Acidantheras have sprouted and are doing fine. To my amazement the Dahlia's are also starting to grow. Sadly I have seen no growth for the Begonias but yesterday I noticed that 2 Crocosmia have just broke the surface. I have a feeling the flickr page is going to get updated a lot more often soon.
Perhaps the most exciting thing in the garden is that last years Jolanda Lilies are back!
It is really wonderful to see something return the next year. Gardening on the street means you take your chances. It is good to see some plants can thrive under stressful conditions.
Well I have finally got off my but and posted something. Hopefully this will inspire me to keep it up!
Saturday, April 12, 2008
The Race Heats Up! - BulbWatch 08
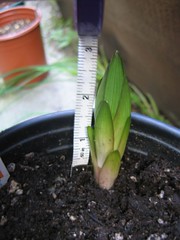
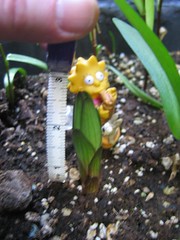
On Wednesday I noticed the the "Casa Blanca" Lilly had started to sprout. I waited until Thursday to take a photo, but was lazy and forgot to make a blog posting. Well today I went out back and noticed the the newest entry into the race has already taken second and is growing fast. I guess you have to if you are going to reach 5 feet! So exciting!
Thursday, April 3, 2008
Second Place...
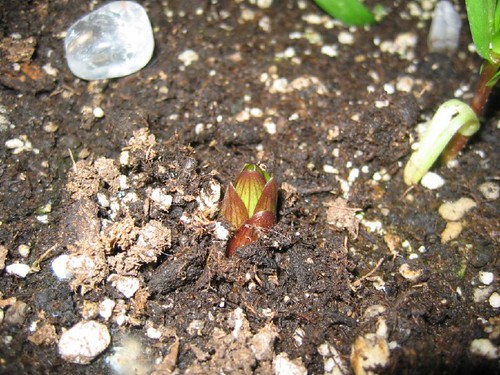 BulbWatch 08 - Breaking Update (ground breaking that is)
This one just broke the surface today and is reaching for the sun.
In second place is the Oriental Lilly (Aubade)
This one is going to be really pretty.
It seems like both of the bulbs I planted in this large pot are the first to sprout. I think this pot is going to look pretty amazing come summer! Stay Tuned.
Subscribe to:
Posts (Atom)